Mesh Extrusion
Thin, continuous geometries such as pipes, plates, sheets, multi-turn inductors and many others can be a challange to mesh for default meshing algorithms - NETGEN and Triangle : Mefisto, as these algorithms will produce unnecessarily large mesh element count.
Fortunately, there is a way to avoid this by meshing with a more "hands on" approach. The meshing method used for these kind of geometries is Extrusion 3D algorithm. This method works by taking a 2D face and extruding it along the volume of the object, creating a very fine, but in element count low mesh.
How to use Extrusion 3D
First up you have to choose the face and volume for extrusion.
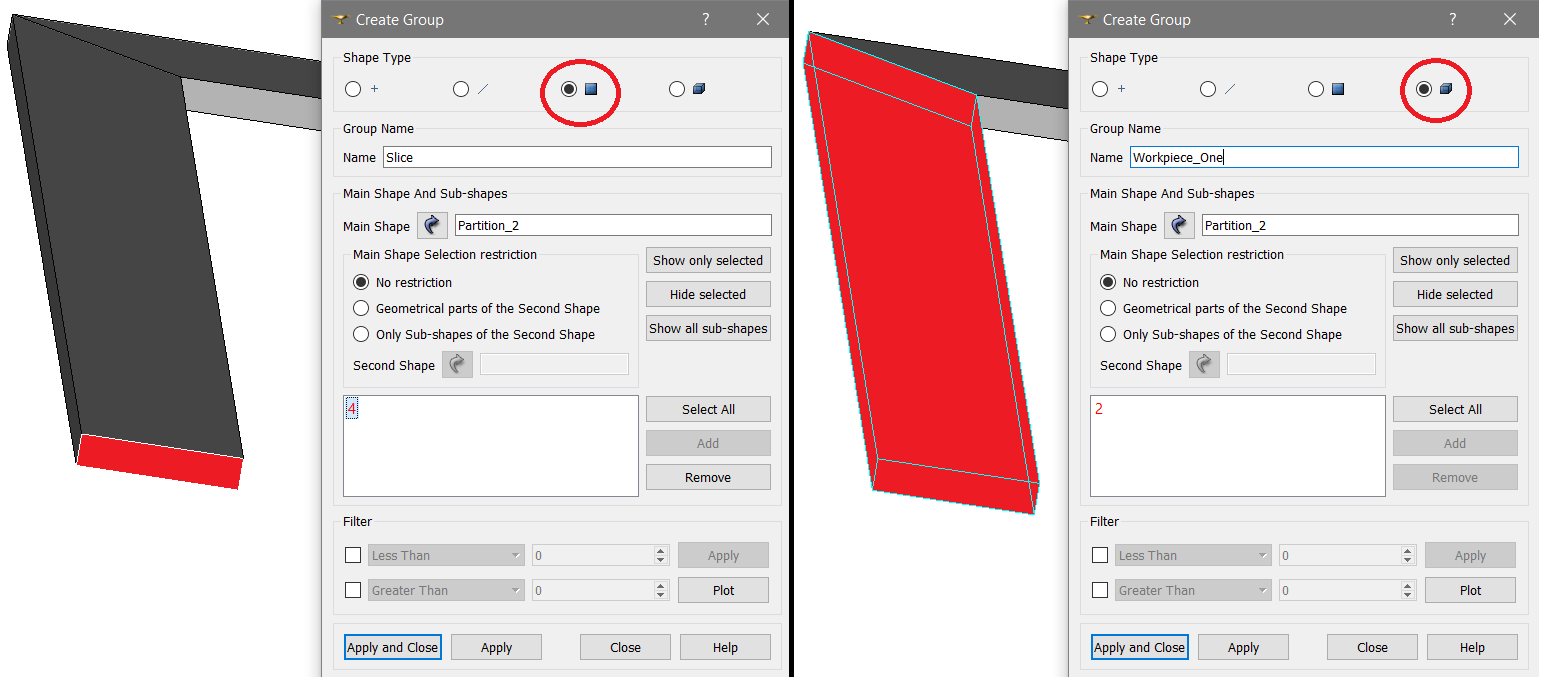
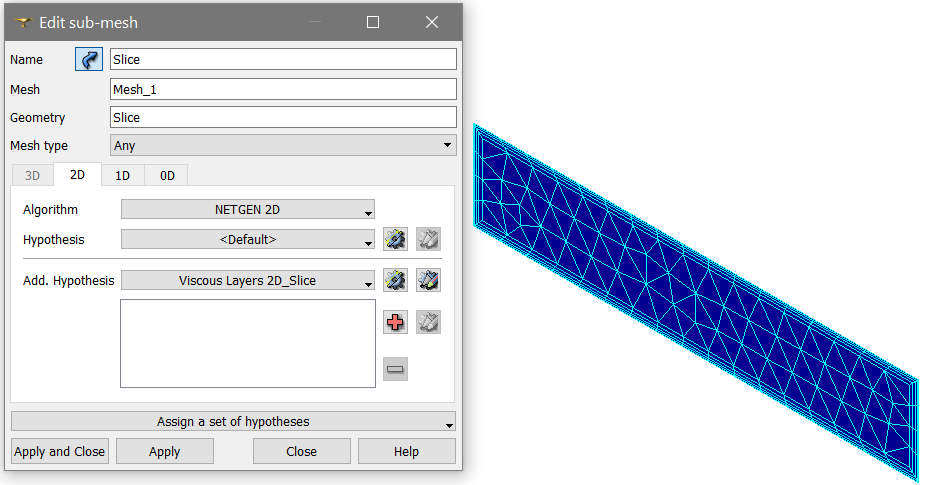
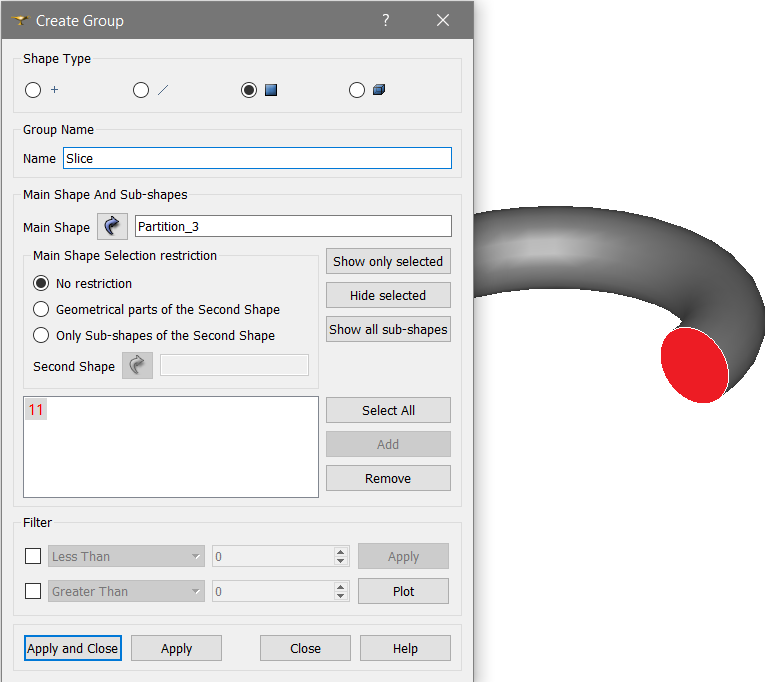
Define one end of the volume as a separate 2D face group. You will use this face to extrude it's mesh along the volume of the object. In this example we will call this face "Slice".
Define the volume of your object, over which the mesh of previously created face "Slice" will be extruded. In this example we will call this volume "Workpiece_One".
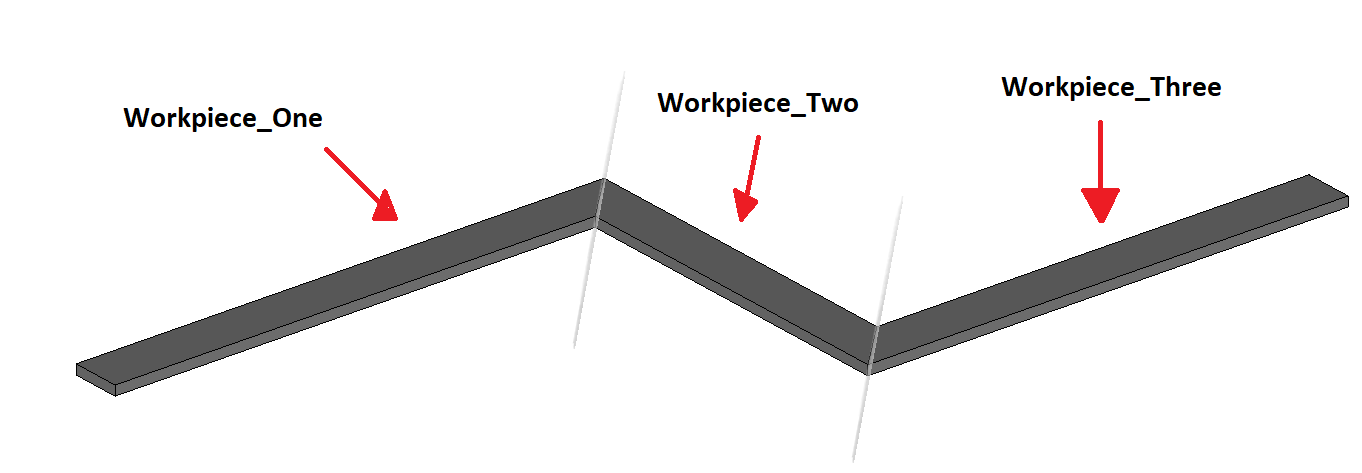
iMPORTANT : If your geometry is continuous, you can group the rest of the volumes in this step as well.
After defining the groups, move on to the Mesh module, make a simple mesh with partition geometry and start defining the sub-meshes.
Make a 2D sub-mesh for the Slice group. Choose NETGEN 2D algorithm and define the Viscous layers if necessary. This viscous layers definition will automatically be used in the Extrusion 3D algorithm.
Now we need to define the mesh extrusion part.
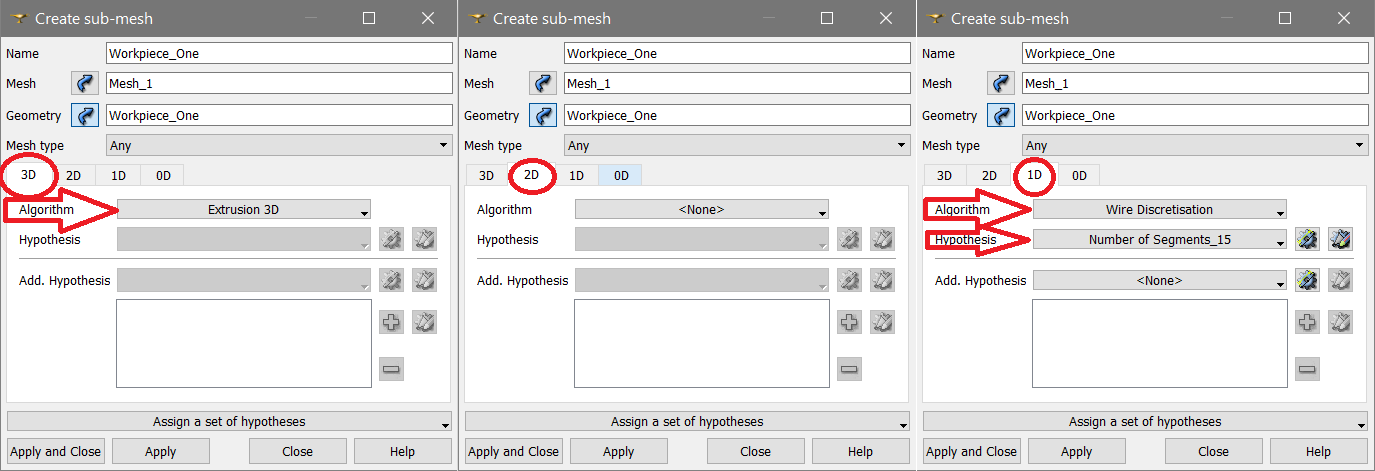
Create a new sub-mesh for the first volume group, "Workpiece_One". In the 3D section choose Extrusion 3D as the algorithm.
In the 2D section leave it at None . In the 1D section choose Wire Discretisation and for Hypothesis choose Number of Segments. This value determines in how many sections the Slice mesh will be extruded along the volume. The larger Number of Segments will be, the finer the mesh will be as well!
After making the volume sub-mesh, set the order of sub-meshes. Make sure to put the Slice with higher priority than the volume, as volume will need the Slice mesh first in order to get it extruded.

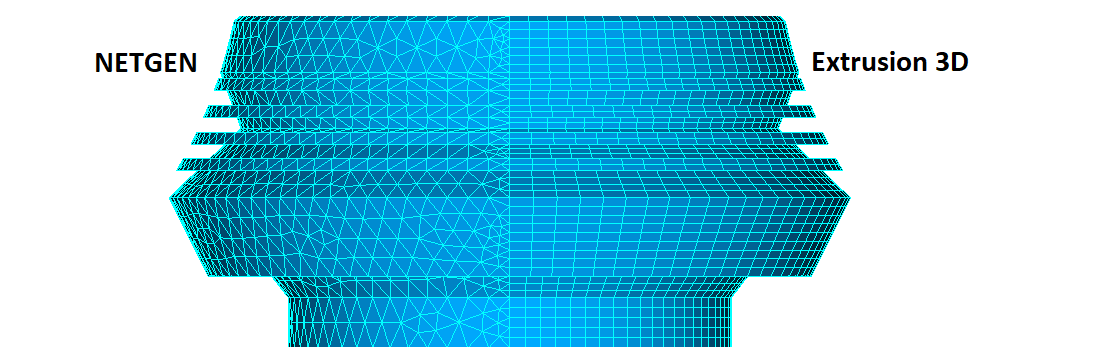
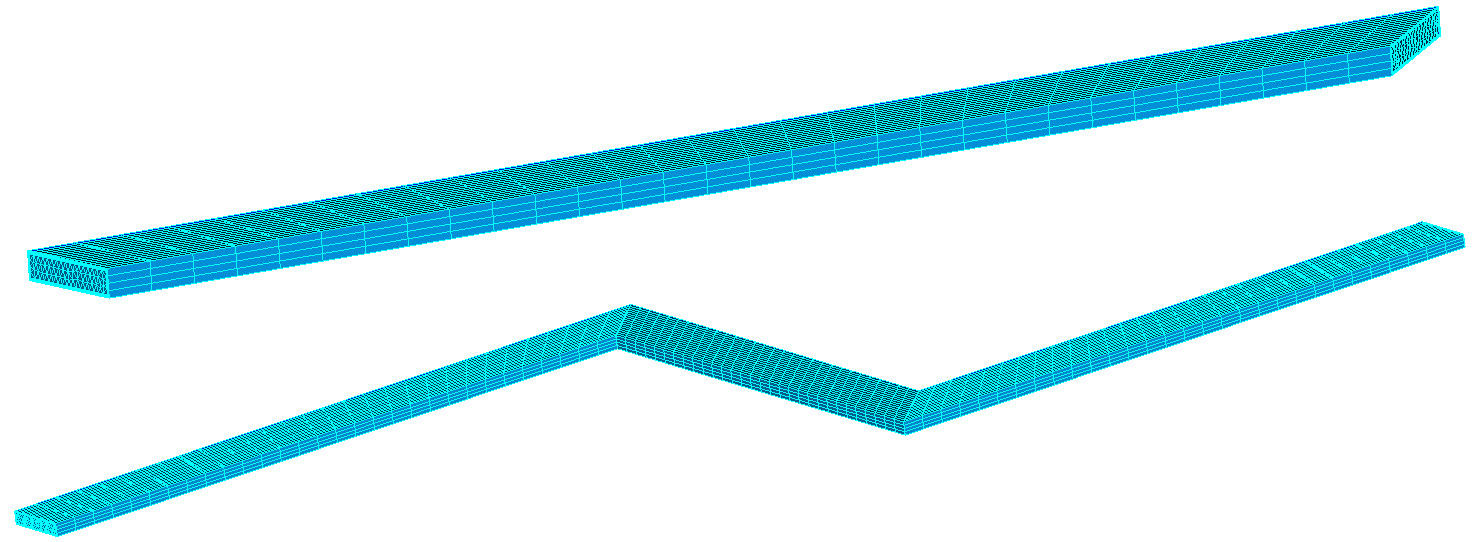
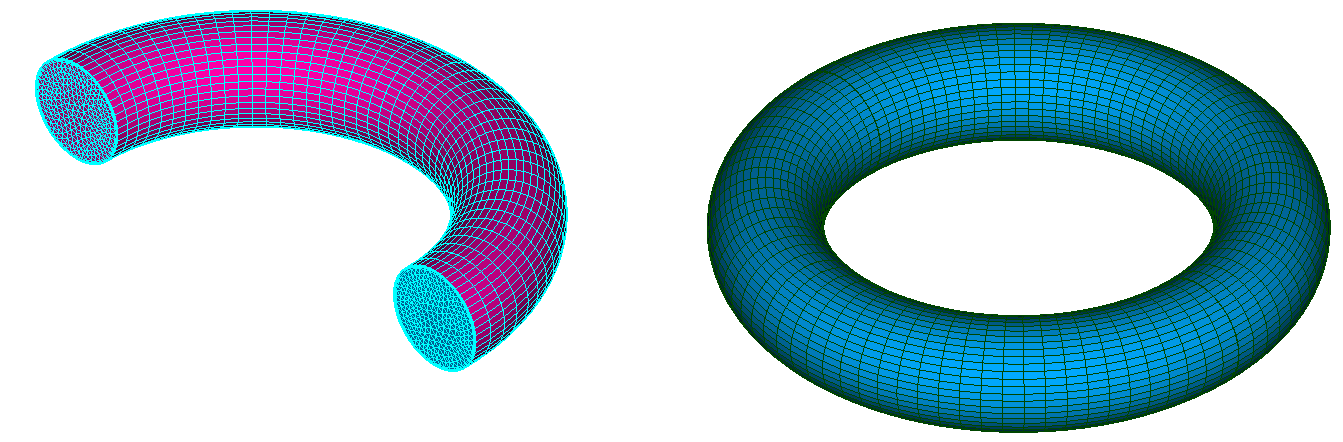
In the picture below is the result of the Extrusion 3D algorithm. If you want to extrude the rest of the volumes after the first one, just define them in the same way as the first one!
Extrusion of round objects
Sometimes the geometry is conntinuous and closed, on which you can still use the Extrusion algorithm.
Lets take a look at this ring, which is axially symmetrical to one of the axis. As you can see, it is a whole ring, but split in 2 volumes - which is done on purpose, because if the ring is completely solid, Extrusion 3D algorithm will not work.
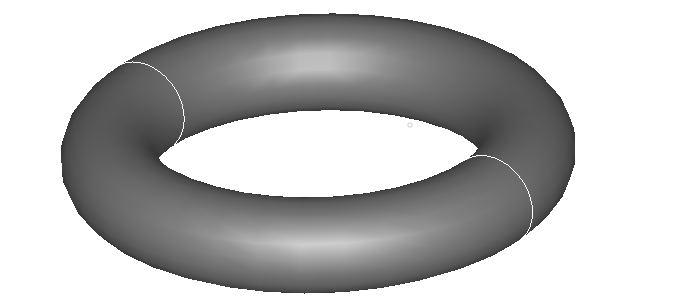
For extrusion of round objects you first have to take out one of the cross section planes and create a group for each of the ring halfs and for one 2D cross section.
In this example we will also call this face "Slice".
After going through the previously discussed meshing steps, we can get the results out of this symmetric part, as visible here.
Limitations
There are however some drawbacks to the Extrusion 3D algorithm. You need to take into account that more time will be spent preparing the case, but this will result in time saved overall, as simulation will finish faster due to more optimized mesh.
Geometry continuity
If your geometry consists of 2 or more solids joined together, make sure that the geometry is as clean as possible, with the volumes continuing at the end of each other.
In the picture, pay attention to the wireframe of the volume. First one is with a clean, continuous wireframe, the other is with a twisted wireframe - this will not allow 3D Extrusion to be used.